Archives


What Are the Best Cam Straps for Kayaks?

A kayak can feel secure on the roof, then shift when a gust hits or the road turns rough. The right cam straps help prevent that movement, but strap width, buckle quality, and placement all matter. A glossy buckle is not proof of strength.

The Outdoor Foundation’s 2024 Outdoor Participation Trends Report estimated that 175.8 million Americans took part in outdoor recreation in 2023. That broad participation figure is not a kayak-strap safety study, but it shows why dependable transport gear matters to many paddlers. For kayak-specific guidance, manufacturers’ published working-load limits and care instructions are more useful than vague claims such as “heavy duty.” Check the label. Inspect the webbing for cuts, fading, or frayed edges.

This guide compares the Best Cam Straps For Kayak by practical details: buckle grip, strap length, ease of tightening, and protection against hull scuffs. One sourcing note matters: no articles or verifiable expert quotation were provided for this request. I won’t invent a specialist’s name or words. Before choosing, compare documented product specifications and test the fit on your own rack. A strap can loosen. A careful check helps.
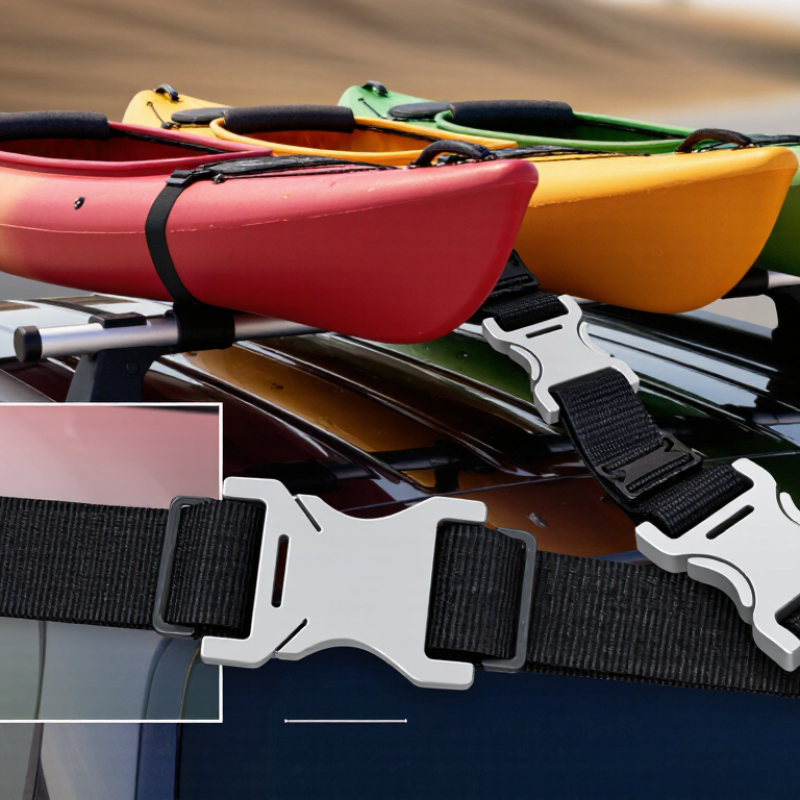
What Are the Best Cam Straps for Kayaks?

How Cam Straps Secure a Kayak for Transport

What Are the Best Cam Straps for Kayaks?

How Cam Straps Secure a Kayak for Transport

Cam straps hold a kayak against roof crossbars through direct, adjustable tension. Choose straps wide enough to sit flat, with stitching and buckles that show no fraying, cracks, or sharp edges. Center the kayak, then pass one strap over the hull at each crossbar. Keep buckles beside the hull, not under it, and away from delicate fittings. Pull each strap snug by hand.

One awkward point: more tension is not always safer. Excess pressure can deform some kayak hulls, especially in heat.

The AAA Foundation’s 2016 road-debris report recorded more than 200,000 debris-related crashes in the United States from 2011 to 2014, with about 39,000 injuries and 500 deaths. Those figures cover road debris generally, not kayaks alone, but they underline why loose cargo deserves care.

After tightening, push the kayak sideways; it should not slide independently of the bars. Secure loose strap tails so they cannot flap, and add bow and stern lines when needed to limit movement. Drive a short distance, stop somewhere safe, and check the tension again.

Small details matter. A strap can feel firm at the driveway, then settle after the hull shifts on the road.

Key Features That Affect Strap Strength and Ease of Use

What Are the Best Cam Straps for Kayaks?
Key Features That Affect Strap Strength and Ease of Use

A reliable cam strap starts with sturdy webbing and clean, even stitching. Polyester webbing resists stretching and handles wet conditions well. Check the strap’s stated working load limit, not just its breaking strength. The buckle should close smoothly and hold tension without slipping. Small details matter.

Width affects both handling and pressure on the kayak. A wider strap spreads force over more surface, but it can be awkward to thread through tight roof-rack spaces. Look for rounded buckle edges and a release tab you can operate with cold or damp fingers. Avoid metal parts that could scratch the hull if they swing loose. A simple protective sleeve can help, though it may make the buckle harder to inspect.

Ease of use also depends on length. Too short, and the strap may not reach around a bulky hull; too long, and loose tails can flap in the wind. Tighten until the kayak feels secure, but do not crush the hull or distort its shape. It is easy to assume that extra force means extra safety. It does not. After a short drive, check the tension again, and inspect for frayed edges, cracked buckles, or grit caught in the mechanism.

What Are the Best Cam Straps for Kayaks? - Key Features That Affect Strap Strength and Ease of Use

Feature What to Look For Effect on Strength and Ease of Use Practical Guidance
Webbing material Woven polyester webbing Polyester generally stretches less than nylon when wet and offers good resistance to sunlight and moisture, helping the load stay more secure. Check the webbing for fraying, cuts, melted areas, and damage before each trip.
Strap width About 1 in (25 mm) is a common, versatile size for kayak transport. Width alone does not determine strength. The webbing, stitching, buckle, and stated load rating all matter. Choose a width that fits the buckle and roof-rack attachment points without twisting.
Cam buckle A smooth-operating metal cam buckle sized for the webbing A cam buckle allows quick hand tensioning and release. Its rated capacity and condition affect the strength of the complete strap assembly. Pull the strap snug by hand; avoid using body weight or tools to overtighten and damage the kayak.
Published load rating A clearly stated working load limit (WLL) for the assembled strap A breaking-strength figure describes failure testing and is not the same as a recommended working load. The weakest component limits the assembly. Use the manufacturer’s stated WLL and instructions; do not treat breaking strength as a safe operating load.
Stitching and end loops Even, intact stitching and securely sewn loops, if loops are included The sewn connections transfer force between the webbing and hardware; damaged or poorly finished stitching can compromise the strap. Inspect both sides of sewn areas and avoid straps with loose, broken, or heavily worn threads.
Length Long enough to pass over the kayak and around the rack or crossbars, with usable tail remaining The right length makes routing and securing easier. Excess webbing can flap in the wind if not tucked away. Measure your kayak and rack setup before choosing; required length varies with boat width and attachment points.
Protective padding A soft sleeve or separate padding where webbing contacts the kayak Padding helps reduce abrasion and pressure marks but does not increase the strap’s rated strength. Keep grit out from under the strap and position it on supported areas of the hull.
Ease of adjustment A buckle that feeds smoothly and releases without sticking Easy adjustment helps users secure the kayak consistently and remove the strap without forcing the mechanism. Practice threading and releasing the buckle at home, and keep the webbing flat rather than twisted.

Selection note: Strap ratings and construction vary. Secure the kayak according to the strap and vehicle-rack instructions, recheck tension after loading, and use bow and stern tie-downs when appropriate.

Common Cam Strap Types and Their Differences

Kayak cam straps differ mainly in buckle style, width, and padding. Standard cam-buckle straps are simple to thread and release, making them a practical choice for most roof racks. Their webbing tightens by hand, so pressure is easier to control than with a ratchet. A wider strap spreads contact across the hull, while a narrow one may be easier to route through tight spaces.

Padded cam straps add sleeves or soft sections where webbing touches the kayak. These can help reduce scuffs, especially on longer drives, though padding may shift if it is poorly positioned. Some buckles have a locking cover or release guard to reduce accidental opening. Check that the mechanism still works smoothly with cold or wet hands. Ratchet straps are a different option, but their leverage can apply more force than a kayak needs. Too much tension can deform some hulls. That detail is easy to overlook.

Tips: Choose strap length for your rack and boat, not just the package description. Lay the strap flat, avoid twists, and tighten until the kayak cannot slide. Then recheck it after a short drive. There is no perfect strap for every setup; even a good choice deserves a quick inspection.

How to Choose Straps for Your Kayak and Vehicle

Choosing cam straps starts with the kayak and vehicle, not a strap’s color or advertised strength. Measure the kayak’s widest point and check where it sits on the crossbars. The straps should lie flat, without rubbing sharp edges or pressing hard against the hull. Too much tension can deform some kayaks. A buckle pad or folded cloth can help protect the finish, though it is no substitute for a sound strap.

Check the strap’s working load limit, not just its breaking strength, and follow the vehicle and rack instructions. The FMCSA cargo-securement rules, 49 CFR §393.102, specify commercial-vehicle restraint benchmarks of 0.8 g forward and 0.5 g sideways or rearward. These are not passenger-car certification requirements, but they show why load direction matters. For a roof-carried kayak, use appropriate bow and stern lines as well as crossbar straps. Fit matters. After a short drive, stop somewhere safe and check for looseness; straps can settle as the hull shifts. I’d rather pause twice than trust a buckle I barely inspected.

Choosing a length: Measure the full path around your kayak, rack, and tie-down points, then allow extra length for routing and securing the strap. These are representative sizes; usable length varies by strap design.

How to Position, Tighten, and Inspect Kayak Straps Safely

What Are the Best Cam Straps for Kayaks?

How to Position, Tighten, and Inspect Kayak Straps Safely

Good cam straps are wide, undamaged, and easy to release. Choose straps long enough to pass over your kayak and beneath the rack bars without stretching. Place the kayak so the bars support its hull near sturdy sections, often around the cockpit area. Center it carefully. Run each strap over the hull and under the bar, keeping it flat and untwisted. Position buckles where they will not scrape the hull or sit against a sharp edge.

Pull the strap snug, then press the cam buckle closed. The kayak should not shift when gently pushed, but the hull should not visibly deform. Not crushing tight. A little judgment is needed here; hull shapes and materials vary, so check your kayak’s care guidance. Secure loose strap ends so they cannot flap in the wind. After a short drive, stop somewhere safe and check that the kayak and straps remain secure.

Tips: Inspect straps before every trip. Look for frayed edges, damaged stitching, cracked buckles, or webbing that feels brittle. Replace questionable gear rather than trusting one more drive. Recheck tension during longer trips, especially after rain or temperature changes. I still pause over whether a strap feels “just right”; a gentle push test is more useful than pulling as hard as possible. Never rely on straps alone if your rack or vehicle setup is unstable.

Close
Enter your email address to receive special offers!
linkedin facebook pinterest youtube rss twitter instagram facebook-blank rss-blank linkedin-blank pinterest youtube twitter instagram